By default VMware virtual machines only PXE boot on first install. Once an operating system has been installed on the hard drive, it will boot that and never try to network boot again. This is due to the default BIOS boot order. By changing the boot order, they can be configured to try a network boot first and after a short timeout boot from disk.
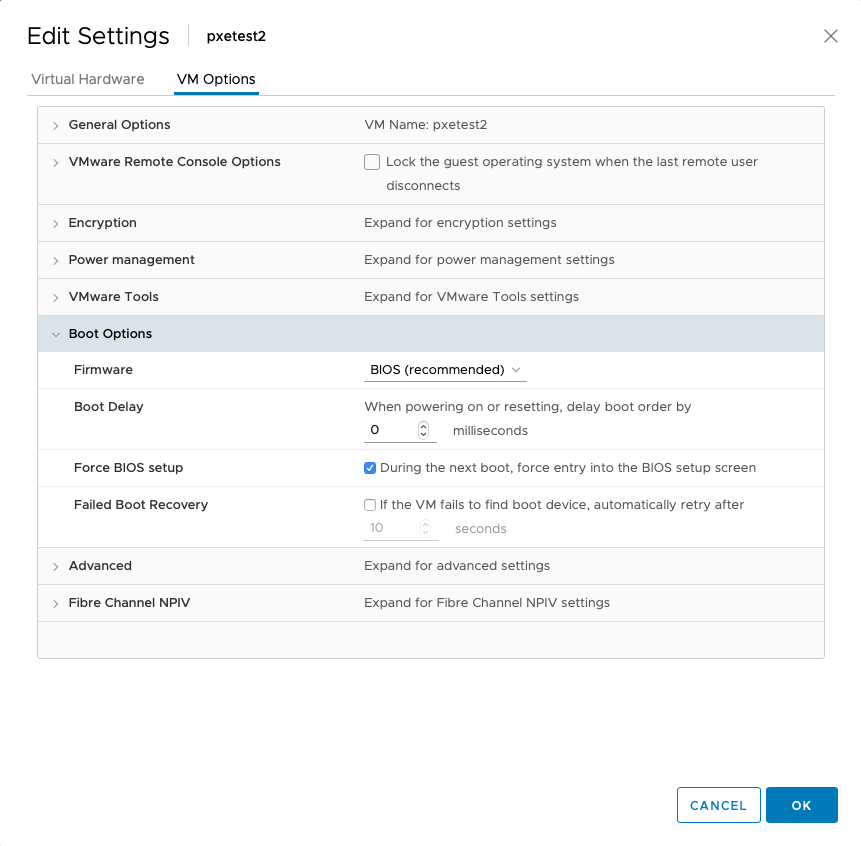
In the vSphere client, find the VM in question, and chose Edit Settings. Under VM Options, expand Boot Options and enable the
“Force BIOS setup” option.
Connect to the console and reboot the VM. It should now boot directly
into the BIOS Setup Utility. Use the arrow keys to navigate to the
Boot menu. Note that “Hard Drive” is listed before “Network Boot”.
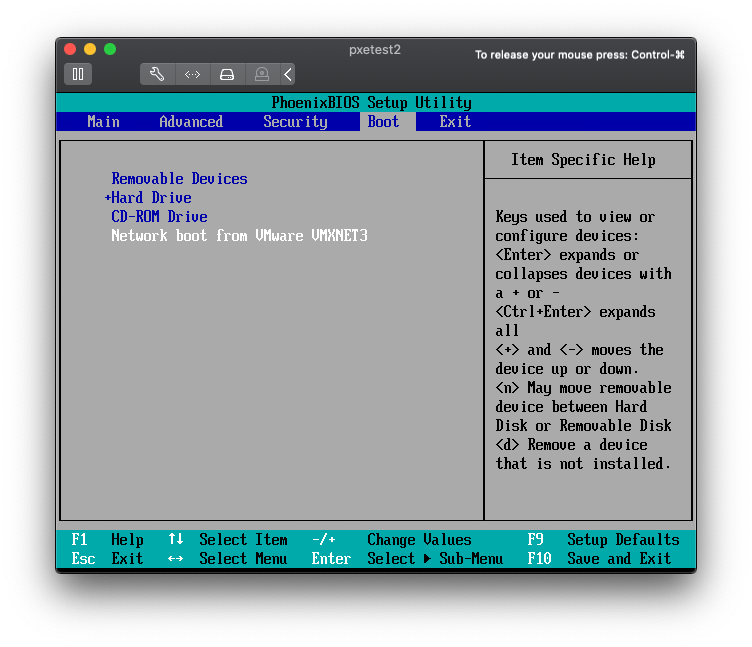
Use the arrow keys to highlight the “Network boot” item and then the +
key move it above the “Hard Drive” item.

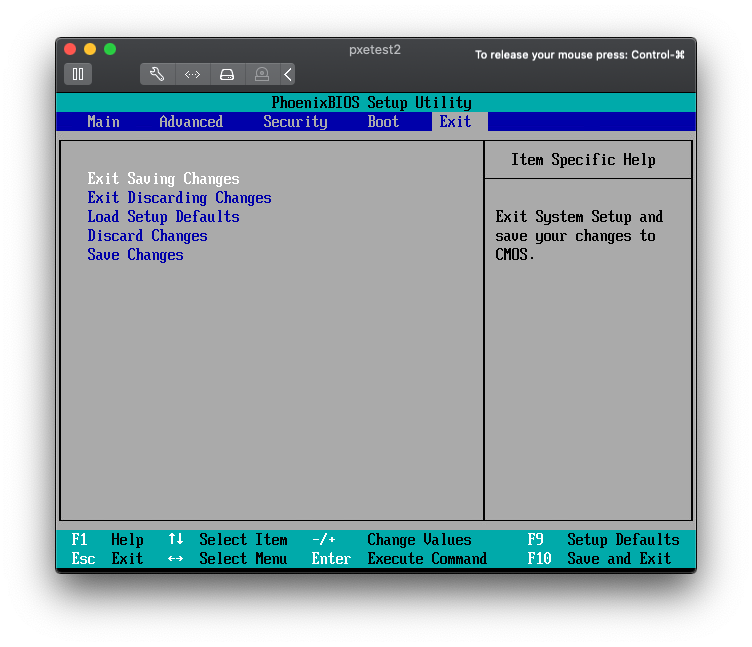
Move to the Exit menu and press Enter to “Exit Saving Changes”.
Now, every time the VM boots, it will first network boot. If that fails, it will then boot the disk normally. Configure your PXE server to continue booting to the hard drive after a short timeout if there is no user interaction. This is typically the default configuration for most setups; the relevant part of our pxelinux configuration that does this:
TIMEOUT 50
ONTIMEOUT local

[...]

LABEL local
  MENU LABEL Boot first hard drive
  LOCALBOOT 0
Unfortunately, this whole process is manual. I’d like to know if there is a programmatic way to make these changes. The best I’ve come up with is to do this manually to one virtual machine, and use that as a template for future VMs.